
This little snake is really quite simple to make. He makes a great decoration and a great gift for anyone who either likes snakes or has the zodiac sign of the snake!
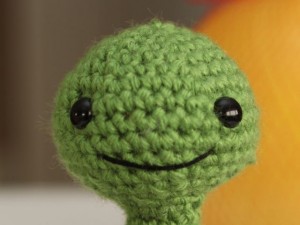
His head, you might notice, is the pretty much the same head as Sheldon the turtle! The placement of the eyes and the added mouth makes the difference.
His body is one long piece and there is minimal sewing required.
MATERIALS
USD3/3.25 crochet hook
Worsted weight yarn ( I used Vanna’s choice)
- green (Fern)
- cream
- orange ( Terracotta)
yarn needle
6mm safety eyes
black embroidery thread
fiber fill
(optional)polyester pellets/beads
HEAD
Rnd 1: 6sc into magic ring
Rnd 2: 2sc into each st [12]
Rnd 3: (sc, inc) repeat around [18]
Rnd 4: sc around [18]
Rnd 5: (2sc, inc) repeat around [24]
Rnd 6: (3sc, inc) repeat around [30]
Rnd 7-10: sc around [30]
Rnd 11: (3sc, dec) repeat around [24]
Rnd 12: (2sc, dec) repeat around [18]
Stuff the head with fiber fill and place the eyes and backings at this point. If you wait until later, the opening of the head will be too small to manipulate the eyes well. Thread your embroidery thread onto your needle and sew the mouth as well, You will want to tie the ends of the mouth inside the head before the opening gets too small.
Rnd 13: (sc, dec) repeat around [12]
Rnd 14: 4sc, dec, 4sc, dec [10]
Fasten off and leave a tail
BODY
Be careful and patient when starting at the tip of the tail! It can be a bit hard to handle because there are so few stitches and everything is so tight together. Do it slowly and carefully and everything will turn out right!
with green yarn
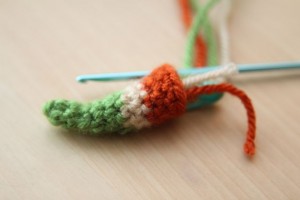
Rnd 1: 4 st into magic ring
Rnd 2: sc around [4]
Rnd 3: 3sc, inc [5]
Rnd 4: sc around [5]
Rnd 5: 2sc, inc, 2sc [6]
Rnd 6: 2sc, inc, 2sc, inc [8]
with cream yarn
Rnd 7-8: sc around [8]
with orange yarn
Rnd 9: sc around [8]
Rnd 10: 3sc, inc, 4sc [9]
Rnd 11: sc around [9]
with green yarn
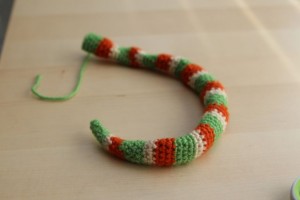
Rnd 12-13: sc around
Rnd 14: 4sc, inc,4sc [10]
Rnd 15: sc around [10]
with cream yarn
2 rounds straight [10]
with orange yarn
3 rounds straight [10]
***
4 rounds of green yarn
2 rounds of cream yarn
3 rounds of orange yarn
***
repeat this stripe pattern 7 times
end with 4 rounds of green yarn
Fasten off
The body doesn’t really need to be stuffed. I started to drop in some polyester pellets but then decided that I didn’t really need them. So in actuality, my snake is partially filled with pellets but it really doesn’t seem to make much of a difference. In fact, if the entire body is stuffed, I don’t think it would be possible to coil and twist it the way I have in order to make it stand up. It’s definitely better to leave it emptier inside. The only part you should stuff is in the neck, where the first green/orange/cream pattern is. After stuffing the neck with a bit of fiber fill, sew the head onto the body. Both openings have 10 stitches each, so it should be a seamless transition. Please refer to my pictures for coiling your snake.
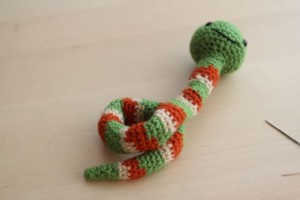
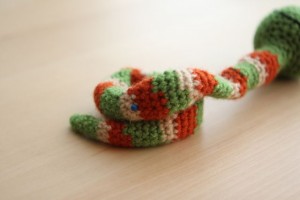
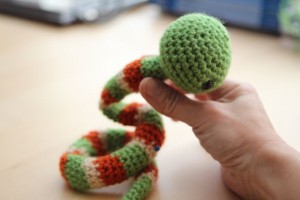
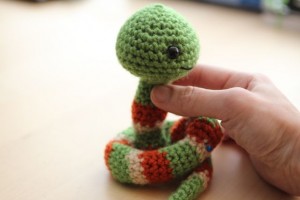
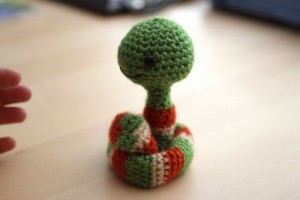
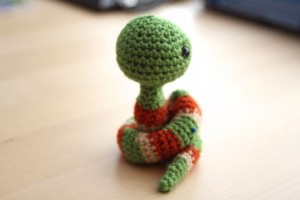
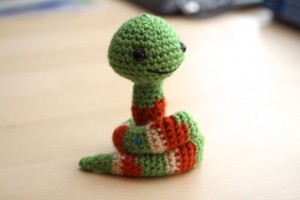
You are basically done with your snake! The part of the body that was initially pinned together needs to be sewn together. You can do this discreetly on the inside/underside of the snake. You may also want to pick one other spot, maybe where the back of the “neck” touches the back coil. If you reinforce your snake in those two areas, your little doll should be very stable and stand up nicely on its own!
Congratulations! You have finished your own amigurumi snake! Please feel free to send along pictures of your creation or post on my facebook page (www.facebook.com/littlemugglesworld) for all to enjoy!
Cheers!

Beautiful 🙂 our baby due in May will be a water snake so I am going to make one thank you 🙂
Congratulations to you on your new addition!! Thank you for leaving a comment and please enjoy the pattern! Have a great day!
I love it! ♥ Monica
Wow this is awesome i am always traveling so I’m gonna do this on the plain but I’m sorta confused but ill figure it out . Thanks so much please post more muggles
Nice page!
I am a renowned wizard from Winnipeg. Please see my magic site. I won several prizes for being the greatest magician, today I need to talk about my illusion with you. I’ve preformed as a mentalist for many years all over Europe. I am one the most talented and best magicians in Winnipeg!
Thanks!
http://www.youtube.com/watch?v=_vXJkWPakTM
My friends daughter was born back in March and I plan on putting some bells in the head so she could use this as a rattle! Such a cute pattern thank you for sharing!
im a bit new to amigurumi, ive done a tiny cat so far. Im a bit confused by the 2sc inc and 3 sc increase. if you could offer some advice id really appreciate it!
Hello there! Hope I can help you out! “2sc, inc” means you make a single crochet in the first two stitches, and then you increase in the next stitch (make 2 single crochets into the 3rd stitch). “3sc, inc” would be similar.. you’d make a single crochet in the first 3 stitches and then increase into the 4th stitch. Let me know if you have any other questions! You can contact me at littlemuggles@yahoo.com for faster replies! Thank you!!
These patterns are adorable, can they be downloaded as a PDF File?
Hi there! My free patterns are not able to downloaded as PDFs. My apologies!
i love it so cute
My daughters Travel Volleyball Team is named Venom. This is the perfect little thing for them to attach to their volleyball bags!